Fiber Optic Splicing Guide
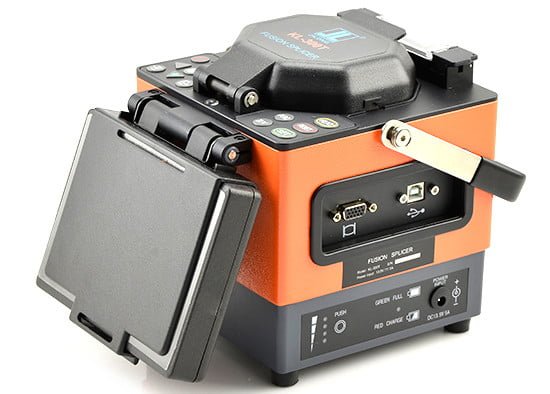
As fiber deployment has become mainstream, splicing has naturally crossed from the outside plant (OSP) world into the enterprise and even the data center environment. Fusion splicing involves the use of localized heat to melt together or fuse the ends of two optical fibers. The preparation process involves removing the protective coating from each fiber, precise cleaving, and inspection of the fiber end-faces. Fusion splicing has been around for several decades, and it’s a trusted method for permanently fusing together the ends of two optical fibers to realize a specific length or to repair a broken fiber link. Then how to do fusion splicing? You may need a fiber optic splicing machine called fusion splicer.
What Is Fusion Splicer?
Fusion splicer may be the act of joining two optical fibers end-to-end using heat. The thing is to fuse both the fibers together in such a way that light passing with the fibers is not scattered or reflected back from the splice, and thus the splice as well as the region surrounding it are almost as strong because virgin fiber itself. The basic fusion splicer apparatus includes two fixtures which the fibers are mounted and two electrodes. Inspection microscope assists in the placement in the prepared fiber ends into a fusion-splicing apparatus. The fibers they fit in to the apparatus, aligned, and then fused together.

Initially, fusion splicing used nichrome wire as the heating unit to melt or fuse fibers together. New fusion-splicing techniques have replaced the nichrome wire with fractional co2 lasers, electric arcs, or gas flames to heat the fiber ends, causing them to fuse together. The little size of the fusion splice along with the development of automated fusion-splicing machines make electric arc fusion the most popular splicing approaches to commercial applications.
Fusion Splicing vs Mechanical Splicing
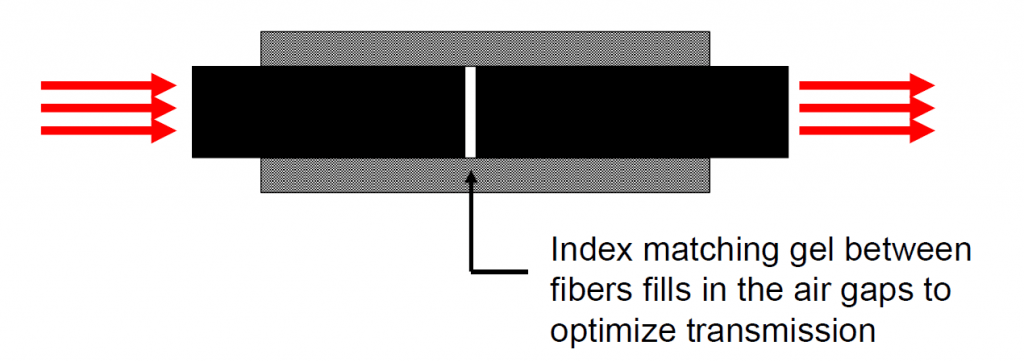
There are two types of optic fiber splicing. One is fusion splicing we mentioned above, another is mechanical splicing (shown in the figure below). In mechanical splicing two fiber optic cables are held end to end inside a sleeve using some mechanical mechanism. In this type of technique fibers aren’t joined permanently rather just accurately hold together, so that light can easily pass through from one end to another, while in fusion splicing two fibers are fused or wielded together using an electric arc, fusion splicing is most widely used technique because it provides a reliable join with lower insertions loss and practically no back reflection. Fusion splicing is generally applied on single mode fibers but in some special cases it can also be used for multi mode fibers.

Fusion Splicing Steps Introduction
Splicing fiber optic cable ends together is often a precise process with hardly any room for error. This is because the optical fiber ends must be gathered absolutely perfectly to be able to minimize potential optical loss or light leakage. Properly splicing the cable ends demands the usage of a high-tech tool called a fusion splicer. A fusion splicer perfectly mates the optical fiber ends by melting or fusing them to the other. Splicing fiber cables surpasses using connectors considering that the fusing process results in a superior connection that features a lower level of optical loss. When performing a fusion splice there are generally five different steps:
1. Stripping the fiber
To start fusing your fibers together, you must remove or strip the protective polymer coating around the optical fiber. This is usually done with a mechanical stripping device, similar to a pair of wire strippers. Remember to clean the stripping tools before you start the fusing process.
2. Cleaning the fiber
After the fiber has been stripped of the coating, it’s time to clean the bare fiber. Using a 99.9% isopropyl alcohol (IPA) and lint-free wipes will keep the glass free of any contaminations.
3. Cleaving the fiber
A good cleaver is crucial to a successful fusion splice. The cleaver nicks the fiber and pulls or flexes it to cause a clean break rather then cut the fiber, which makes the end-face flat and perpendicular to the axis of the fiber.
4. Fusing the fiber
After the fibers have been cleaved, fuse them together with a fusion splicer. First, you must align the ends of the fiber within the splicer. Once properly aligned, melt the fibers with an electric arc, permanently welding the ends together.
5. Protecting the fiber
After the fibers have been successfully fused together, the bare fiber is protected either by re-applying a coating or by using a splice protector.
Conclusion
Fusion splicing provides permanent low-loss connections that are performed quickly and easily, which are definite advantages over competing technologies. In addition, current fusion splicers are designed to provide enhanced features and high-quality performance, and be very affordable at the same time.
